How do I get started with MediaProof?
How do I install MediaProof pixel on Wordpress?
How do I install MediaProof pixel on my Shopify Store?
How to setup MediaProof with Shopify conversions?
How to setup MediaProof with Shopify conversions?
If you have a Shopify store and you want to show the latest conversions or the conversions count of certain products that you are selling on your Shopify store, then follow this guide.
Connecting Shopify with MediaProof is a straightforward process but can be quite confusing for someone who has never used Webhooks previously.
What we want to happen
Lets understand the workflow first. Here is what is going to happen in order to make this work:
1) A Shopify order is completed/paid for
2) Shopify sends a "message" to MediaProof with the details of the order
3) MediaProof receives, parses and stores the "message" from Shopify
4) Now the Notification created with MediaProof will show the latest conversion that happened on Shopify.
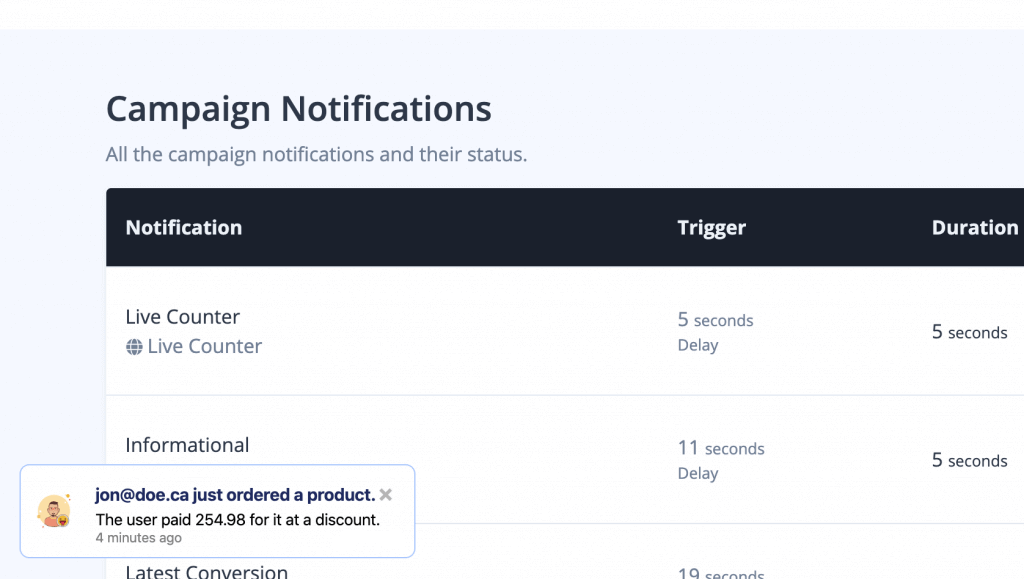
Here is how it would look like:
Prerequisites
First off, you need to make sure you have the following steps already done:
1) You have MediaProof installed and ready to go
2) You created your campaign for your website correctly and installed the pixel code on your website.
3) You have a working Shopify store
Create the notification
1) Go to the campaign that you have ready
2) Click the Create Notification button
3) Fill out the name of your new notification and select the type as either "Latest Conversion" or "Conversions Counter" and submit.
4) Make sure that the notification is Enabled!
Configure Shopify
Make sure that you are logged into your Shopify account first of all and then:
From the Shopify admin page, go to Settings and then access Notifications.
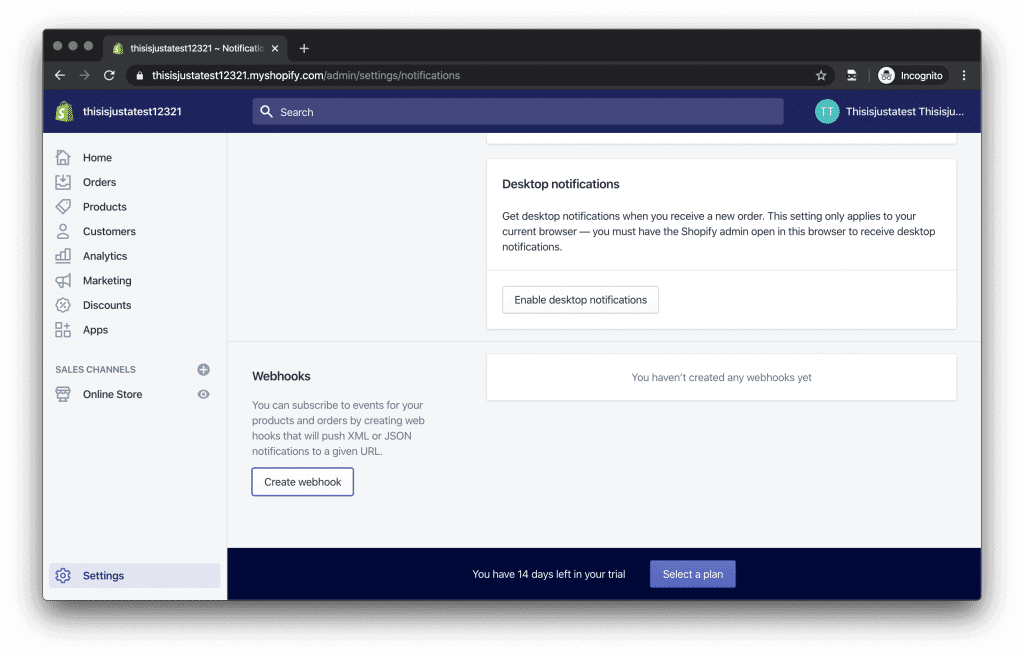
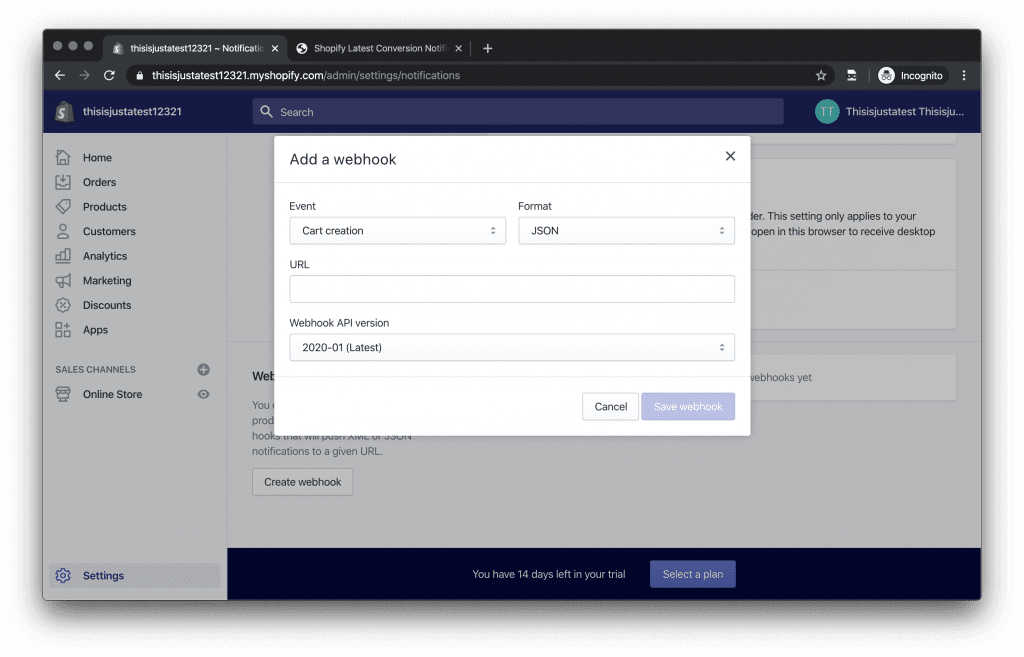
Scroll down to the Webhooks section and then, click the Create a webhook button.
Now you must go to the freshly created notification with MediaProof in the Data tab.
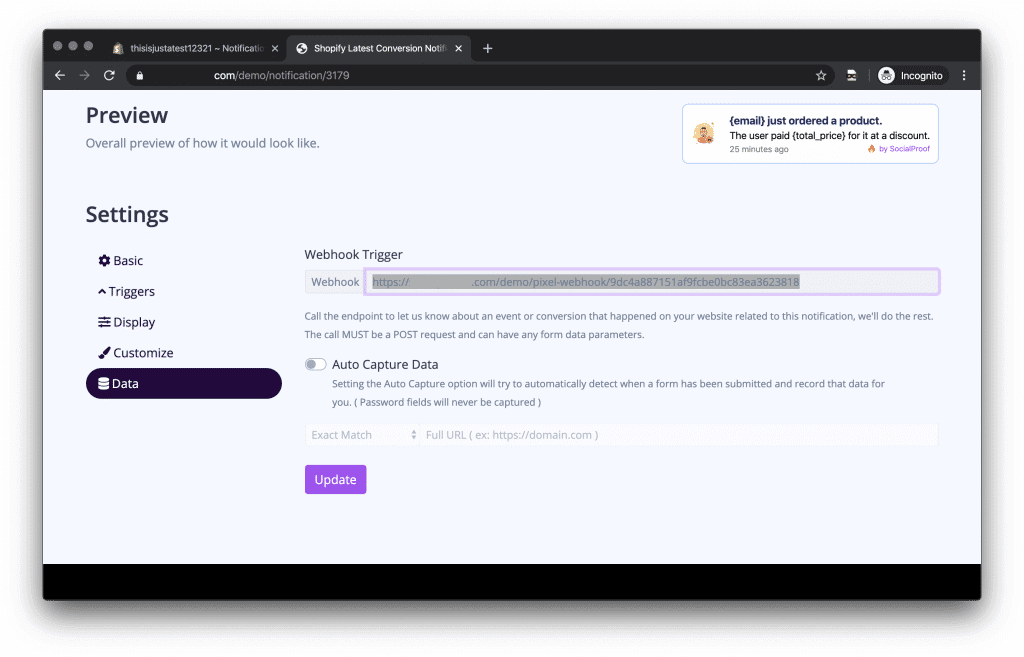
Now make sure to copy the Webhook Trigger URL that is highlighted in the picture above.
Go back to the Shopify store and paste it in the URL field.
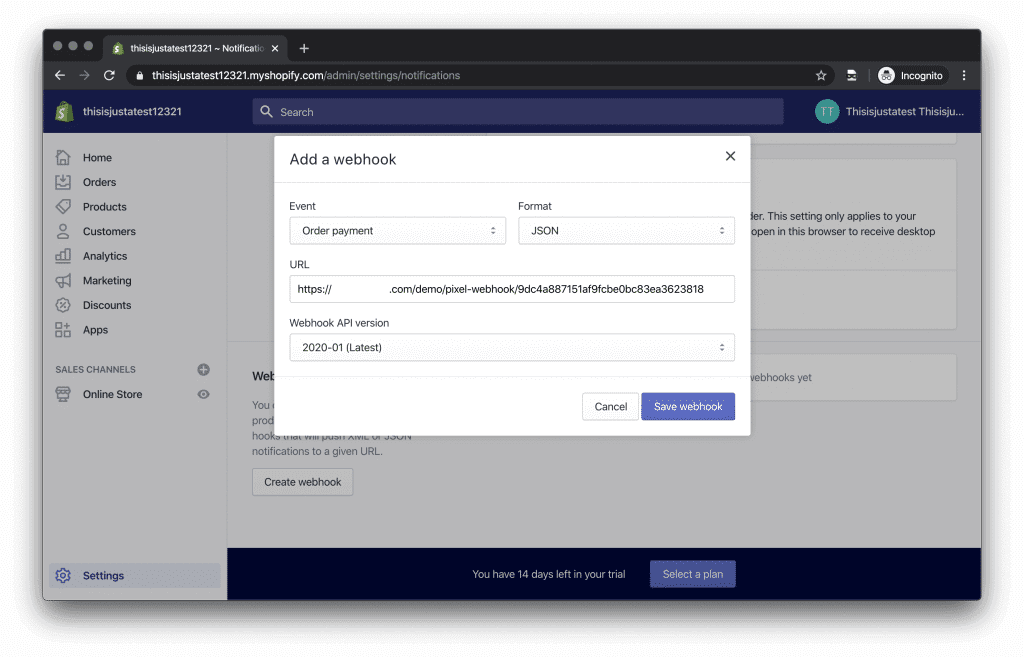
You can now select the Event of the Webhook. More exactly, when should Shopify trigger the execution of the webhook.
In this case, I selected "Order payment" because we want to track the latest order payments with MediaProof.
Make sure to select the Format to JSON and click Save webhook.
Should look like this:
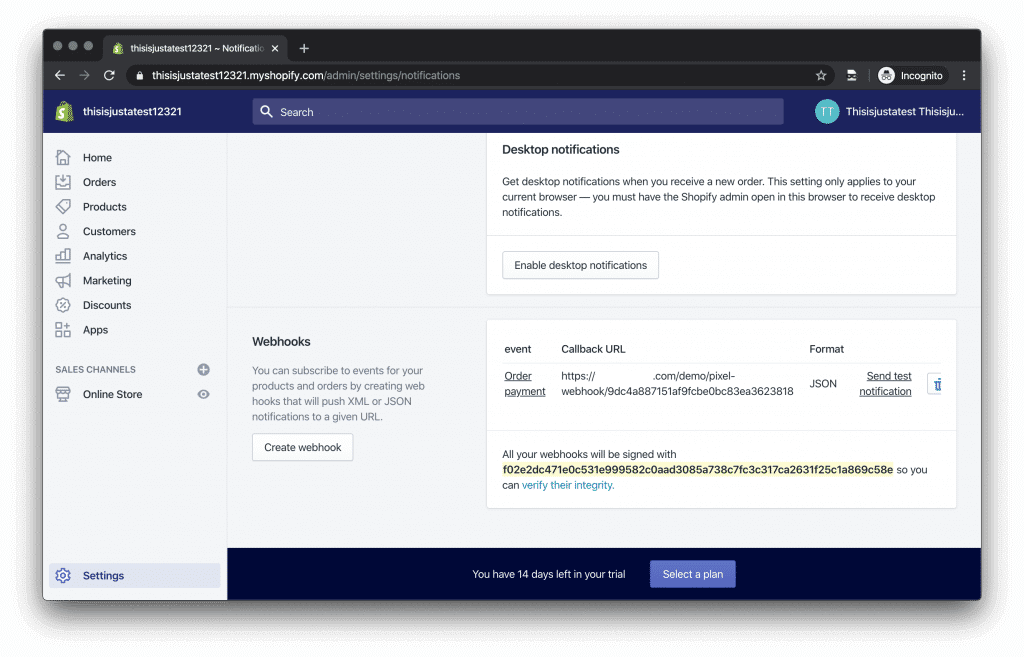
As you can see, now that you have this webhook set up, you can also test it out.
Click on the Send test notification button now.
Now, if we go back to the Notification from MediaProof and access the Data page, we will see something like this:
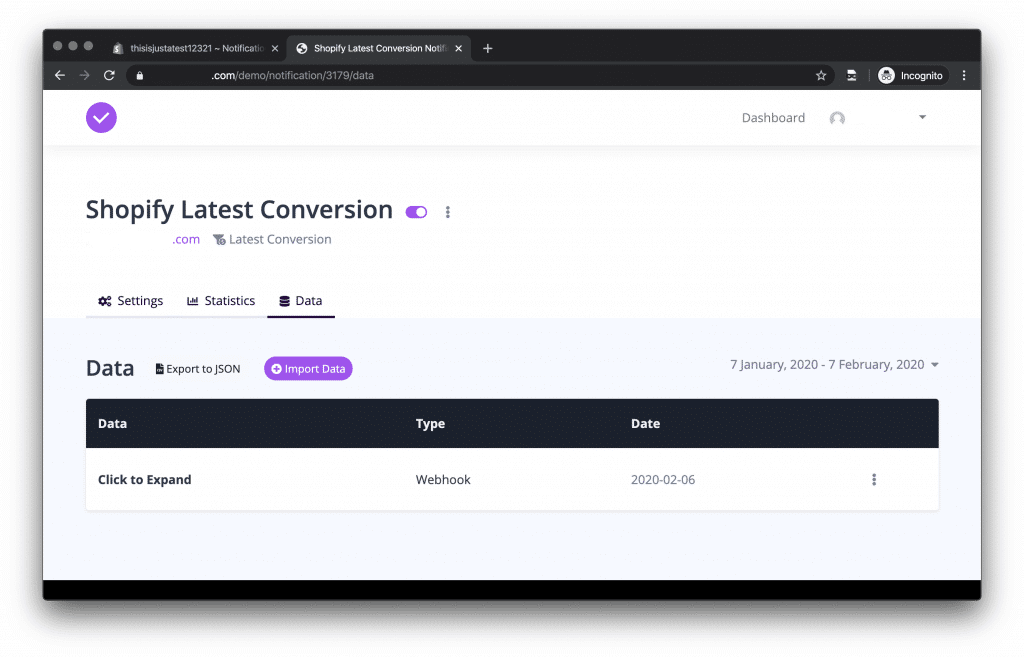
You will be able to see that there is a new "Conversion" registered in MediaProof.
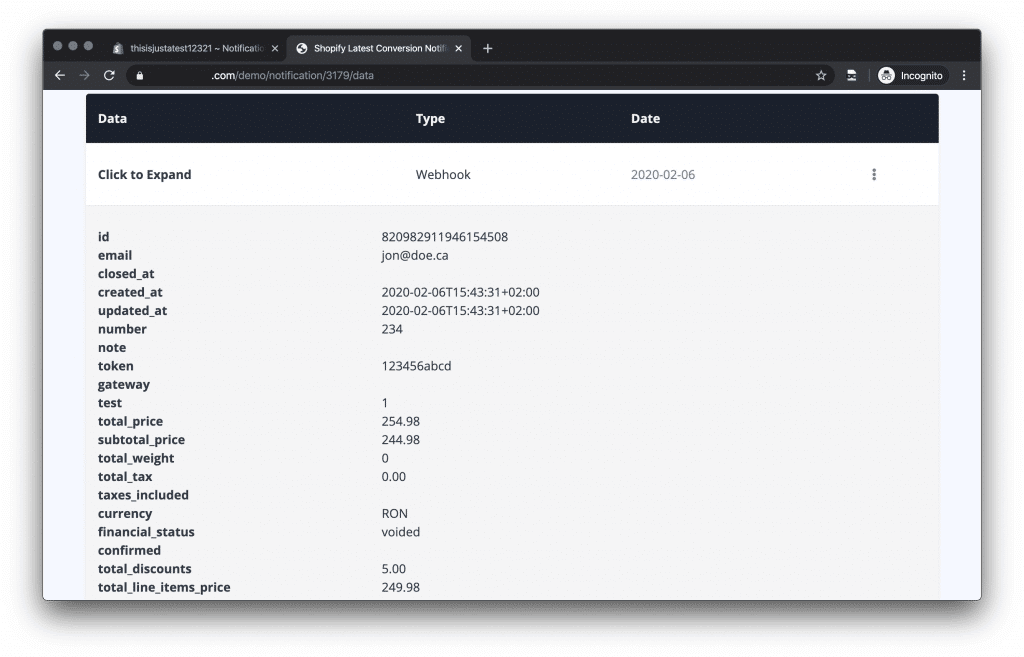
If you Click to Expand then you will be able to see even more details and the caught variables, which you can use in the title or description.
Now, you can go to the Settings of the notification and configure your notification as you'd like.
Here is how I have configured it myself:
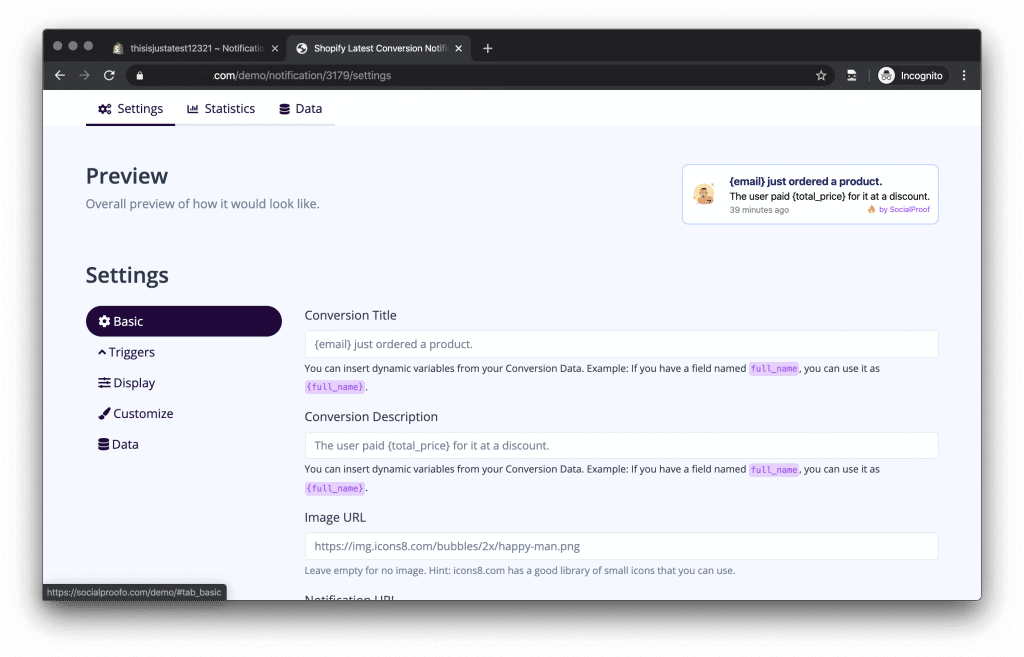
You can see that the Title is using the {email} variable from the conversion data and also that the Description is using the {total_price} variable.
Here is the final result, just like we wanted:
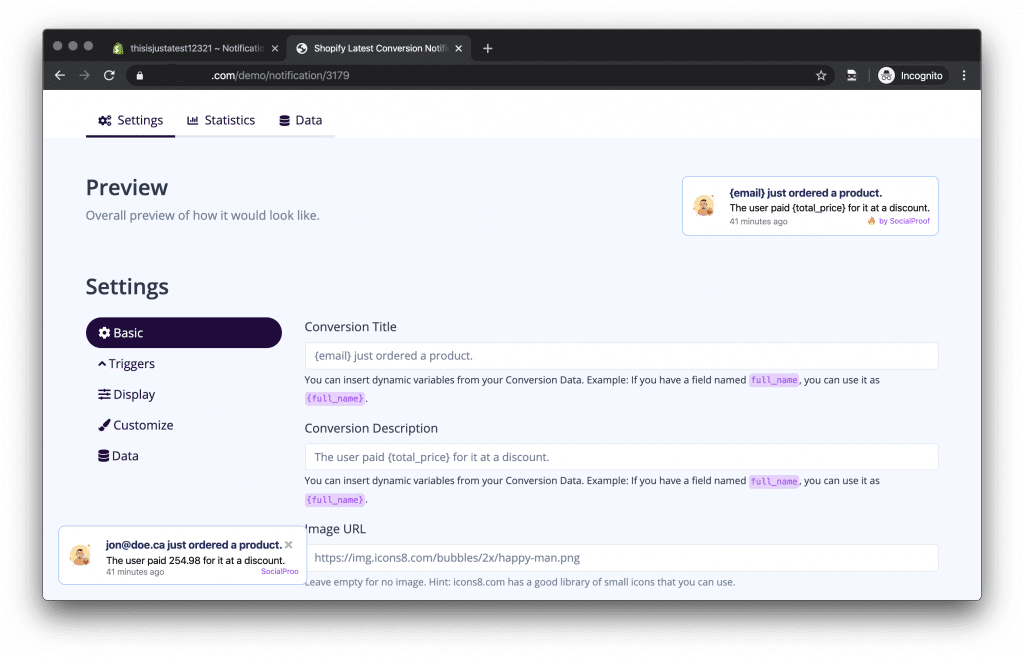
You can clearly see that the notification is using the variables from the latest registered conversion now.
Hope you found this tutorial useful, keep in mind that this is just a test and further configurations can be done, which are totally up to you!